RIVERS OF CARBON
Riparian management tubestock guide
A guide for landholders planting tubestock as part of their riparian restoration projects
This guide has been developed as part of the Rivers of Carbon – Source Water Linkages Project funded through our partnership with WaterNSW.
We have been working with landholders to protect and restore their riparian (land adjoining streams, creeks, wetlands) for 20+ years, by controlling stock, addressing erosion and planting tubestock key activities. This Tubestock Guide has been developed to answer the concerns and questions we commonly get asked by landholders, including:
These are just some of the questions we answer in this guide, which has been designed as a resource you can come back to depending on the stage you are at in your restoration project.
Please note: This guide has been specifically written with the Southern Tablelands in NSW in mind, and although some principles can be broadly applied, we recommend contacting local organisations for advice specific to your area.
Note: To view all information sources please see full references list at the end of this web page
Rehabilitation of riparian zones in Australia has been a priority for the last 35+ years as research has shown how vital they are for water quality, biodiversity and other ecosystem services. They are also important areas within the landscape to potentially sequester carbon due to their higher productivity, biodiversity and ecosystem function. Riparian zones have structurally diverse mixed native plantings, with grasses, sedges, shrubs and trees forming complex layers of vegetation. We also know that riparian zones are more likely to have remnant vegetation that has not been cleared, providing us with further opportunities to extend and connect newly rehabilitated areas with older, biodiverse corridors. Wetlands and chain of ponds systems, with their deeper soils and capacity to hold moisture are also incredibly important, as they sequester carbon by ‘pooling’ it, providing multiple ecological benefits. Sequestering carbon and providing vital refuge for plants and animals in the more extreme weather events that characterise climate change, makes riparian zones a great place to invest our time, money and effort.

Every drop of water that falls within a catchment contributes to the health of the rivers, streams and wetlands that sustain life, connect culture and support society. This makes protecting and restoring riparian areas from livestock by fencing and replanting native vegetation, a vital step in improving the health and water quality for all that depend upon our rivers.

This site is at the beginning of the restoration process, with tubestock newly planted to stabilise the bank and start to protect the stream.

This site is mid-way through the restoration process (8 years), with tubestock doing well and nature providing reeds and grasses around the riparian edge.
When we decide to protect and restore our riparian areas, we are making a conscious choice to improve on-farm productivity, sequester carbon and boost biodiversity. Some of the benefits gained by restoring our riparian areas with native vegetation are oulined below.
Stabilises stream banks, reduces erosion, turbidity, prevents soil and land loss with vegetation roots protecting and strengthening banks.
Improves water quality for livestock. Research has shown that livestock will defecate five times more when standing in water. Livestock weight gains from improved water quality have also been shown – see Livestock weight gains and water quality.
Improves waterway resilience and the ability of water resources to recover more quickly after events such as flooding.
Provides wind shelter for livestock and crops by providing protection from extreme temperatures (hot and cold).
Provides habitat and food for beneficial insects and birds that can help control pest species and pollinate crops.
Can provide a ‘living haystack’ when managed carefully, for strategic crash grazing and stock shelter during drought. Some native shrub and tree species can also provide fodder for stock.
Aesthetic and recreation benefits, such as improved mental health (nice places to be), fishing, kayaking, swimming, all of which enhance farm capital value.
Provides essential habitat for birds, insects and aquatic life so that ecosystems function effectively, resulting in clean water, biodiversity and native species protection.
Shades waterways and regulates extreme temperatures (hot and cold) for fish and aquatic life, providing refuges in droughts by reducing water loss through evaporation.
Creates complexity in the landscape enables our native animals to compete with ferals as planting a diversity of vegetation including groundcovers, shrubs and trees puts back critical habitat for insects, birds and animals to maximise their survival.
Provides an important source of food for aquatic life, as well as habitat structure such as woody debris which is important for fish breeding.
Helps trap sediments, nutrients, pesticides and contaminants from catchment activities before they reach the waterway. This helps improve water quality.
Can provide critical refuge for wildlife, as areas with high quality riparian vegetation are the last places to dry out during times of drought.
Over the last few years our seasonal conditions have been highly variable, and this is likely to continue in our climate changed world. We have heard from many landholders that their tubestock have either died due to drought or to floods, and we know how distressing this can be when so much effort has gone into preparing and planting restoration sites. We know it can feel like a hopeless endeavour to plant tubestock in such variable conditions, however, if you remain patient and persistent, restored riparian vegetation can help lessen the impacts of droughts and floods. If only a few trees and shrubs survive that is a great start, and we recommend ‘hanging in’ as the benefits far outweigh the setbacks. Below is a table that outlines the benefits of riparian restoration. See our article ‘How restoring rivers builds flood resilience’ for further information.
| Restoration action | Result of action | Flood resilience | Drought resilience |
|---|---|---|---|
| Revegetating the riverbank area and maintaining groundcover | Increase the amount of water stored in the floodplain and reduces runoff Slows down the movement of water Increases filtration Stabilises the riverbank Increases biodiversity, and enables a microclimate to develop | Reduces the volume and the speed of water moving downstream, reducing flood damage (to the river and to infrastructure) Improves the water quality of floodwater, limiting the risk of nutrification Decreases risk of erosion with high moving waters | Reduces loss of surface water and retains water in the landscape Microclimate created with increase in biodiversity can reduce air and water temperature, ideal for drought refuge for stock and biodiversity, and can limit the occurrence of algae Retains recreational and aesthetic benefits for landholders |
| Fencing off river to create a large buffer zone | Increases the ‘riverspace’ allowing for connectivity Increases space for natural regeneration | Allows for movement of water onto floodplains and reduces flood peaks moving downstream Enables biodiversity benefits for the river system from a connected floodplain Allows management of stock during high rainfall periods Enables benefits of revegetation discussed above | Enables benefits of revegetation discussed above |
| Keeping stock out of the river | Allows for the growth of revegetation Limits the impacts of erosion or destabilisation of the riverbank Reduces sediment build up and allows for water movement | Enables benefits of revegetation discussed above Decreases risk of erosion with high moving waters | Similar to principles of rotational grazing, allows for vegetation and pasture to grow and regenerate, providing a drought refuge |

When we look at our waterways we need to think about them as living, breathing ecosystems. Our land use practices have meant that we tend to use our riparian areas for watering stock, irrigating and supporting economic growth. We support agriculture, but by not protecting riparian areas we degrade the very parts of the farm that provide the water that underpins success. Rather than a neat and tidy waterway that stock can easily access, our waterways prefer to be messy and complex with a diverse range of trees, shrubs, grasses and reeds, along with living and non-living components such as dead trees providing hollows for birds or habitat on the ground. The diagram below illustrates the difference between waterways that are ‘simple, neat and tidy’, and those that are ‘complex, messy and diverse’. We have a tool called the Stream Condition Checklist that you can use to work out where your waterway is at on the spectrum of simple to complex.
Degraded riparian area (simple, neat and tidy)

Healthy riparian area (complex, messy and diverse)

You can use our Stream Condition Checklist to help you work out the health of your waterways on your property. It lets you assess six features that affect whether a stream is healthy and in good condition including:
The checklist is free to download, and you can also order hard copies through the ARRC shop. It has photos that are colour coded so you can see where your site might be along the spectrum of poor, moderate and good condition. Even if your waterway is in good condition, its important to protect it so that this status can be maintained.


Depending on your site, you may have existing native vegetation, so its good to ask the question should you revegetate with plantings or leave it to regenerate (grows back itself)? To make that decision, it is important to understand which plants you have on site and how likely these are to self-seed or regenerate naturally. As a general rule, sites with a high diversity of plants (trees, shrubs and/or grasses) with good canopy cover and minimal threats (e.g. grazing, salinity, weeds etc.) will often regenerate naturally. In these cases it might be simply a case of fencing these areas so that livestock have limited access and you are able to undertake weed control as needed.
In other cases, there may be a lack of certain plants such as shrubs which may need to replaced, but which otherwise have a good chance of recovery. For sites with little native vegetation remaining, or vegetation in degraded condition, it is unlikely that this site will recover naturally, and planting would be beneficial. If in doubt, it is useful to seek advice from local Landcare groups, Local Land Services and other practitioners in your area.

Self-sown Acacia, known to help restore vegetation to denuded areas
In the photos below you can see different starting conditions for site restoration. It’s really a case of assessing whether you need to act to fill in the vegetation or structural layers needed for a healthy riparian area, or whether you protect and maintain and let nature do the work (see box).

This site is in good condition with multi-layered vegetation at tree, shrub and grass levels.

This site is missing the middle layer of shrubs with overstorey vegetation and groundcover only.

This site is missing overstorey and the shrub layers, we would recommend planting.
If you do have a site with diverse native vegetation in relatively good condition, there is a good chance it will regenerate naturally. In this case, the most important step is to ensure the area is protected from domestic stock. This is because stock eat young plants which makes it difficult for new plant to establish. Healthy existing vegetation once protected, will often regenerate quickly. Once natural regeneration is occurring (i.e. you can see new growth, like a baby eucalyptus tree), then you may consider planting to fill in any gaps between existing vegetation or to diversify the types of plants regenerating (plant different plant species).
There are many advantages to letting the existing vegetation regenerate. Plants from existing vegetation on the site are ‘naturally conditioned’ to this area, which means they can withstand natural fluctuations better than introduced plants. It is also a lot less work, noting that ongoing maintenance of regenerating sites is still very important and requires problematic weeds, keeping stock out of the site and monitoring regrowth.
If there are no signs of natural regeneration within 6-12 months, there may be other limiting factors, such as poor soil condition (e.g. lack of organic matter, too sodic, too salty etc), lack of moisture (e.g. drought), competition from pasture grasses and/or weeds, grazing by wildlife or problems with seed production. In these cases planting may be a necessary step and it will be important to get some advice about which species to choose to fill in missing vegetation layers.

If you have decided that planting is the best option, it’s time to purchase some tubestock. Tubestock are plants that are grown in small biodegradable or reusable tubes or containers. They are typically sold by nurseries and garden centers as a cost-effective way to propagate and distribute a wide variety of plant species. Tubestock are plants that are in their early stages of growth, with a well-developed root system, and they come in a range of shapes and sizes.
Tubestock may be grown from seeds, cuttings, or tissue culture in specialised nurseries and once they develop a healthy root system, they are taken outside to harden off to natural conditions (particularly in cold climates) for one to two months prior to sale. Its a good idea to ask the nursery where the plants have come from to ensure that they have been hardened up to local condition, otherwise they could fail to grow and thrive.
Forestry tubestock is one of the more common options for native revegetation projects. These are rectangular (approximately 2.5cm x 2.5cm x 10cm) which is a good size to ensure there is enough soil around the roots to retain enough moisture and nutrients to enable the plants to establish. They are also a good size to easily handle. Other options include Viro-Cells (100mm pots) or bare-rooted tubestock which are cheaper but require good site preparation, with weeds sprayed and soils cultivated so the plants won’t get out competed. Many grasses, sedges and aquatic plants are supplied as Viro-Cells as they are commonly mass-planted closely together, protecting each other as they grow.

One of our enthusiastic Rivers of Carbon team enjoying a day out planting tubestock.

Rippa Seeder in action.
Image Source: South Gippsland Seed Bank
Direct seeding is another option for revegetation, but we don’t often use it in riparian environments because they are fertile with high grass and weed competition, and are generally less than 50m wide. Direct seeding is typically used in large areas of open farmland, but it may be the case that if you are going out further than 50m direct seeding could be used on the outer edges of your site.
Direct seeding involves planting seeds directly into the soil, by hand or by using a direct seeding machine. The direct seeding machine is a trailer that is towed behind a ute or a tractor with a small plate that scalps soil. Seed boxes (for seeds of different sizes) then release the seed onto the scalped area and a wheel presses the seed into the soil. Direct seeding by hand is generally reserved for special cultivation projects.
Advantages
Disadvantages
Advantages
Disadvantages
When it comes to ordering your tubestock, its a good idea to ask around your neighbours, Local Land Services or organisations like ours, as to which nurseries supply good quality tubestock. We recommend choosing a nursery local to your area (often Landcare groups have a nursery), that has plants grown in the same conditions as your property. Tubestock needs to be pre-ordered, generally at least six months in advance so the nursery can ensure it has the species and size of plants you need. At the same time as purchasing your tubestock you need to order guards and stakes. There are online suppliers, but your local nursery will probably also have them available. Don’t be stingy on the number of stakes as they are what protect the plants against animals like goats who are persistent and eat everything, leaf, stem, the lot! The guards provide vital protection so a minimum of two strong stakes are needed. We often also have a couple of bamboo stakes interwoven through the guard for added support.
Choosing the plant species for your area is a little like establishing a garden – you need to consider:
Generally, for environmental projects, the plant species you select are based on intact vegetation communities in the local region and (if applicable) the existing vegetation that you are connecting to. For example:
As a basic principle, planting species that are native to your region is a must, as they are suited to the local conditions, have a lower likelihood of becoming ‘weedy’ and provide habitat for local wildlife. Climate change does throw an extra variable into the mix, and we are finding that in areas becoming drier or wetter, new species are being added in to recommended mixes as they are better able to cope with these conditions.

Trees Near Me App is a useful tool for properties in NSW to explore which vegetation communities occur in your area. You can this resource either on your phone as an app, or in your browser. Go to: https://treesnearme.app/
When considering plant species, it is important that you choose a range of different plant species (diversity) with a range of different roles (function) This means a range of trees, shrubs, and grasses appropriate to the site to ensure a healthy riparian ecosystem (see section ‘To plant or not to plant? When to consider natural regeneration’ for information on vegetation layers).

Eucalyptus bridgesiana
Image source: Woolshed Thurgoona Landcare Group

Leptospermum obovatum
Image source: Australian Native Plants Society (NSW)

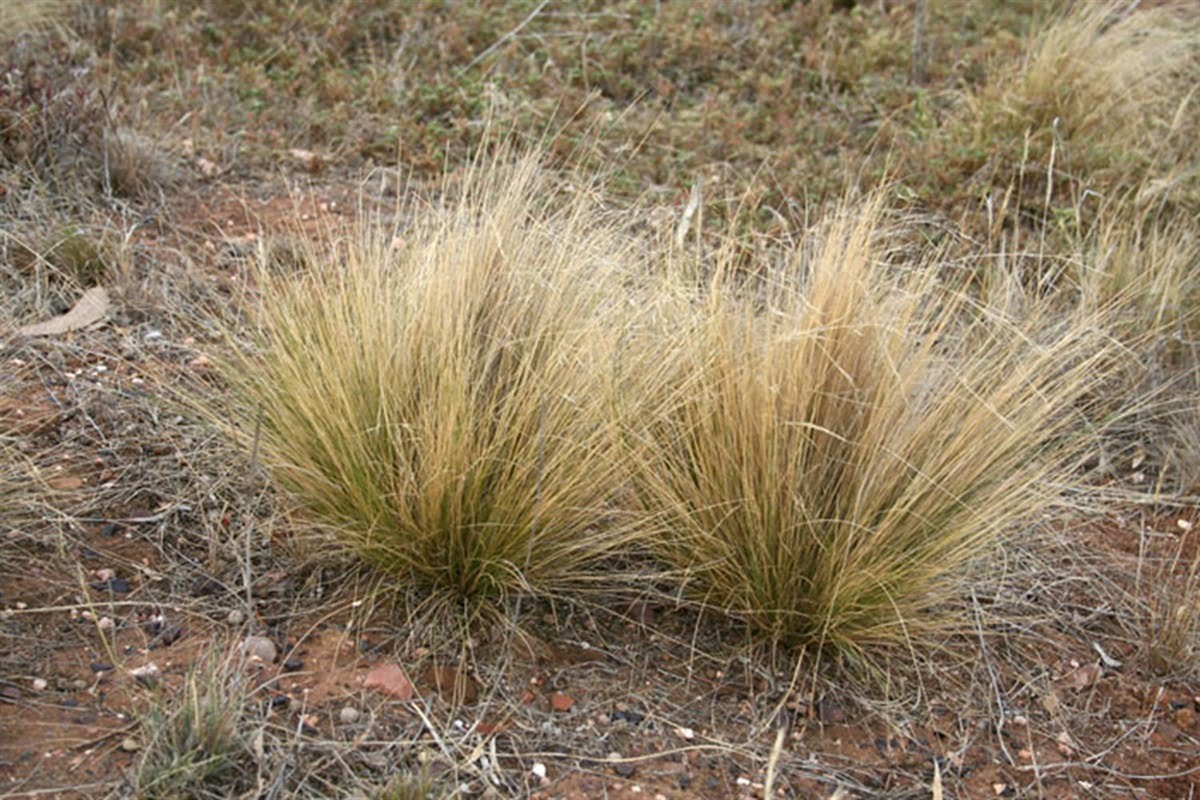
Carex appressa
Image source: Australian Plants Online
Non-native plant species are inadvisable for riparian restoration programs because they have a high risk of becoming invasive (with no natural predators), commonly form a monoculture (only species that grows) which outcompete native plants (this is particularly true for groundcover and small shrubs),and they don’t provide the ecological benefits necessary for native ecosystem function. This is particularly the case with many species of Willow, Black Alder, Box Elder, Elms and others. If non-native plants are being considered for specific reasons, obtain advice on which species to plant to minimise adverse effects. Deciduous trees dropping their leaves can also be detrimental to water quality, creating an imbalance of nutrients and increasing bacterial loads over autumn and winter.
It is important to consider the characteristics of any plant species you want to plant, as each species has particular preferences and will do better in some conditions than others. Some like dry soil, while others don’t mind getting wet. Some like the sun, some prefer shade. Some prefer the cold, others will struggle. These considerations influence what species you plant, and the timing of plantings.
You also need to think about how big each plant is going to get (including height and width). This will influence where you plant the tubestock, and how close together to prevent overcrowding and potential shading issues. Remember to check for powerlines, underground cables and other infrastructure as part of the planning process.
It is also important to identify problematic areas within the site such as rocky outcrops, salt scalds, areas with no top-soil and contaminated areas, and avoid planting these areas until conditions become more suitable. In these areas it may be necessary to undertake other forms of remediation such as erosion control, promotion of groundcover through grazing management, addition of woody debris and organic matter, burning, aeration and/or other site preparation techniques (expanded on below).
 An example of how to develop a species list:
We work with many landholders in the Southern Tablelands of New South Wales. To assist them in selecting vegetation species we created this list of plants we use and which we know will survive in this region. There are four distinct seasons in the Southern Tablelands which make it a tough environment for plants to establish and survive. For a site in this area, we want to have a range of plant species that can either grow in dry areas, riparian areas (more fertile and wet) and/or can grow in cold climates. In this list we have made notes about the plant species that require specific conditions (indicated), along with those that are more generalists and can do well in all conditions. This list is free to download – Native revegetation species list. Talking to someone is also a good idea, and you are welcome to contact the Rivers of Carbon project team, your local Landcare Group, Local Land Services or nearby nurseries for site specific advice on suitable plant species for your area.
With a changing climate, there may be exceptions to what plants are suitable to use, whereby plants from further afield – outside of the area you wish to plant, may need to be considered. It is advisable to obtain site specific advice if you think this may apply to your site. A useful organisation to contact is Yass Area Network of Landcare Group, who are working on Climate Ready Vegetation in NSW.
The spacing and number of your plants will depend on your desired look, project outcomes and existing site characteristics. We recommend developing a plan prior to planting, so that you know where your mix of species are going to be distributed across your site.
In general we use 8m spacings between trees, 4-5m spacings between shrubs and 1-2m spacing between grasses, sedges and forbs. This assumes mixed plantings of trees, shrubs and grasses. Some species (especially forbs) are better mass planted. These densities allow for losses of up to 20% (or an 80% success rate) whilst still maintaining good cover. Always think about how the plants will look in 20, 30 or 50 years, especially Eucalypts!

Randomizing the spacing between plants is also an option which allows for natural regeneration and provides different types of habitats for wildlife. You may also prefer to plant in clumps to retain some open spaces and add to structural complexity (variation between shrubs, trees and ground cover). This is an approach to consider if you want to increase habitat for small birds. These clumps need to be less than 100m apart for small birds to move between or, alternatively, a continuous corridor may be preferred for more complete wind shelter.
The answer is as big as you can allow it to be within management and financial constraints. Generally, larger, block plantings are better than small, narrow plantings for waterway protection, biodiversity and streambank stability.
Connectivity is also key! Plantings located near (or connected to) other plantings or remnant vegetation are better for wildlife than isolated patches. Its also good to look for opportunities to conenct your plantings to other natural features such as streams, rocks, logs and paddock trees. You also need to think about the size of the stream, type of vegetation, soil and flooding regime. There are guidelines on the best biodiversity outcomes for the size and shape of revegetation plots. (See Shelterbelts guide). In the case of riparian areas, you should protect and restore as much of the riparian corridor as possible.

A protective riparian buffer strip enabling a range of different vegetation types to thrive within the context of the overall farm.
The appropriate time to plant is dependent on your local climate. Unless you live in a very cold area, generally you can plant any time except in summer when soil moisture is too low for plant establishment. The timing of planting also depends heavily on the climatic conditions, for example, you may wish to delay planting during extended drought.
Ideally, planting immediately following a period of rain is best as it ensures a good level of soil moisture. If you choose to plant in late autumn or winter, you need to ensure that tubestock have been hardened off outdoors in similar conditions to the planting site or they are likely to suffer frost damage. If in doubt, get in touch with your local nurseries for guidance on the best planting times for your region.

Preparing your site before planting is crucial in helping your tubestock survive. Site preparation for planting involves site cultivation (ripping, hole digging, aeration) and spraying (or applying some other method) to reduce plant competition for nutrients and moisture. The level of site preparation will depend on site conditions, but is usually required to some degree.
Try to prepare your site at least one season before you plant your tubestock, this is so the site can be weed free and able to support plant growth. If this is not possible, a month beforehand is the very minimum, and you may need to modify your efforts to focus on hole digging and vegetation removal around where each tubestock is to be planted. Weed control is an ongoing task as part of aftercare, particularly, if it is not effectively carried out in advance. In some cases riplines or spot cultivated sites are over sprayed after the soil is prepared, but this depends on the level of groundcover – if biomass is high, it can interfere with soil preparation machinery.
Weed control is essential as weeds can compete with your tubestock for space, water, light and nutrients. ‘Weeds’ in this context is defined as any unwanted plants that may compete with newly planted tubestock (e.g. grasses). If you have invasive weeds (such as Love Grass, Serrated Tussock, Woody weeds and others), you need to develop a strategy to manage these at a property scale and over a number of years. Tubestock planting can play a role in helping to manage these weeds, as when they grow they can shade out some invasive species. Until the time they are big enought to do this, however, weed management is essential to ensure they are not overrun.
Chemical options
The best time to undertake weed control depends on your groundcover species. For example, for a spring planting it is advisable to do a weed spray the previous spring, then a spray in autumn, followed by another spray in spring just prior to planting. This spray regimen is for grasses sich as Phalaris or the invasive weeds mentioned above. Phalaris deserves special mention because it contains root substances that are allelopathic to other plants, that is, they give off compounds that favour their own growth and establishment. Other less invasive grasses can be sprayed 3-4 weeks before you plant.
Glyphosate is recommended to knock down competition for tubestock planting as it remains in the soil for a short amount of time (generally less than a week) and it is the only chemical registered for use along waterways. In some cases other chemicals like residual herbicides may be needed to manage invasive weeds. Residual herbicides remain in the ground for longer periods of time (sometimes more than a year depending on conditions) and this must be factored into your planting program if it is likely to affect new planting. Always check recommendations on the label for herbicide use.
Non-chemical options
For sites where the use of herbicide is not appropriate (e.g. organic operations, sensitive plants) options may include mowing, brush cutting, hand weeding, crash grazing, and / or biological control. These are successful to varying degrees, but as none of these methods outright kill plants, a plan is required to manage their regrowth. For example, grazing or mowing can also reduce biomass, however, it should be noted that this will also reduce the ability of grasses to take up chemical so they are likely to return once grazing pressure is removed.
Few more tips
When undertaking weed control for site preparation, avoid disturbing the soil, in particular leaving large areas without vegetation cover, as this leaves the soil open to recolonisation by other weeds, particularly annual weeds which love bare ground. Similarly, large areas of bare ground can also increase the risk of erosion. If you have a large revegetation area to prepare, spray only where you need to. In treelines, for example, spray strips of 1.5m wide (leaving groundcover between rows of trees) or spot spray holes with 1m diameter for individual plants.


Soil cultivation can help increase water penetration and improve root development and plant establishment. It is important to check prior to commencing work that there are no natural and cultural heritage sites being damaged and/or overhead and underground cables you may disturb. Dial before you dig!
For small areas (or areas that are sensitive to large machinery):
For larger areas:

Image source: Southern Rivers Catchment Management Authority
Having done all this work its important to protect your site from grazing domestic stock with fencing. Individual wire plant guards can also be used to protect trees from stock, but these are expensive and only suited to scattered trees and shrubs. Similarly, if there is a high grazing burden from native wildlife such as kangaroos and wallabies, or feral animals such as goats, deer and rabbits, you may need to supplement your guards with more stakes or use a different type of fencing. Standard tree guards will reduce grazing pressure by small animals but will do little to dissuade a determined wombat or wallaby. Plant guards are discussed in the next section.
Other factors to consider
Other things to consider are soil acidity (pH) soil moisture levels, soil structure, salinity, pliability and nutrient levels. There are tools that you can use to help improve the condition of your site, such as increasing the soil pH by adding lime or reducing pH using gypsum (lower pH). You can also improve soil nutrients, structure and moisture retention by adding organic matter like compost. It is recommended that professional advice be obtained if there are major issues with your soil conditions.

In preparation for planting, it is advisable to soak the tubestock in a tub of water to ensure the root system is well hydrated. Fertiliser is not required, as most nursery tubestock come with low phosphorus slow-release granules suited to native plants.
Lay the plants out across the planting site (if possible) leaving a minimum of 8 metres between overstorey plants and 3 metres between understorey plants. Grasses and forbs can be as close as 1 metre apart and do well mass-planted. For spot cultivated sites, 2 or 3 grasses may be planted together. Mix up different species, and if the planting is in rows, ensure that plants are offset from each other in adjacent rows.
For forestry tubes and smaller plants, dig a basketball sized (20cm) hole in the (previously prepared) planting area. The hole should be deep enough so that the top of the root ball is a few centimetres below the surrounding soil surface to create a dish around the plant to catch water. Breaking up the soil at the bottom of the hole will also help encourage root penetration and establishment.
To remove the plant from its container, gently tap the top of the container on a tool or on your boot. This will loosen the soil from around the sides of the plant, and it should fall out in your hands. Do not pull on the plant as you will likely damage the roots. For stubborn plants, continue to tap and squeeze the sides of the pot until it loosens. For plants with very dense root systems you may even need to cut the container. In general terms, tubestock in rectangular pots held up off the ground in racks are designed to air prune and therefore should not be root bound. Some tubestock is planted in biodegradable material, and can be planted directly in the hole
Place the plant into the prepared hole, ensuring that the top of the root ball is slightly below the surrounding soil (as mentioned above). Backfill the hole with soil, gently firming it around the root ball to eliminate air pockets. Avoid compacting the soil excessively as it can hinder root development. Create a slight indentation or ‘dish’ around the top of the plant to catch water and direct it towards the plant.
Immediately after planting, thoroughly water the plant to settle the soil, remove air pockets and create some moisture around the plant to help it establish. A minimum of 3 litres of water per plant is recommended. Follow up watering is usually not required unless drought conditions persist. In these situations occasional deep watering is preferable to frequent light watering, as it encourges deeper and well developed root structures. Watering can never replace natural rainfall, and plants still often struggle, so rethinking planting activities during drought conditions is recommended.
Soil additives such as fertilizer and water crystals are generally not required for large-scale plantings and add an extra (often unnecessary) expense. Native plants are usually sold with low-phosphorus slow-release fertilizer, as most are adverse to high nutrient conditions. Water crystals, while prolonging soil moisture around the roots, won’t guard against drought as they eventually dry out. They can also suck moisture away from roots when it rains (depending on how they are applied). Instead we recommend putting your resources into planning and optimal site preparation.
Plant guards are recommended to protect your tubestock from wind and small grazing animals such as rabbits. Tree guards alone will not protect plants against grazing by domestic stock or large wildlife (unless they are custom made for this purpose), fencing is required for this purpose. You may also need to replace some tubestock or guards as part of maintenance activities. The more you can do in the planning stages, the less likelihood of plant losses and laborious maintenance.

Volunteer Margot, planting on the Mulwaree River
Photo credit: Alex James

Cardboard guard on tubestock
Photo credit: Alex James

130 trees and riparian shrubs planted along the Gudgenby River (ACT), to help combat erosion, increase biodiversity, and to improve water quality. Photo credit: Jed Pearson
There are a number of different types of guards to choose from. Below provides a useful summary of the different types of guards developed by Connecting Country. The costs of each guard are indicative only.

Cost: Low @80c/ guard
Longevity: Low – not reusable
Comments: Breaks down, biodegradable, less light and space for plant. Can degrade quickly in wet climatic conditions and smother plant.

Cost: Low @$1.20/guard
Longevity: Low – reusable if taken care of
Comments: Can blow away, and not biodegradable. Not recommended along waterways.

Cost: Medium @$2/guard
Longevity: Medium – reusable
Comments: Hardy, not biodegradable.

Cost: High @$80/guard
Longevity: High – reusable
Comments: Requires assembly, labour intensive.
Note: Guards can be removed once plants have been established. This is generally when the plant has grown well beyond its guard (1-2 years depending on growth rates). It is important that this is done as the less biodegradable guards can choke larger plants (particularly trees).
Other options to consider
Mulching is also an optional consideration. It can help to suppress weeds around young plants, however broad-scale mulching across vast areas is not recommended as it can suppress the growth of groundcover and change soil conditions that favour higher nutrient weeds. The application of mulch for large-scale rural plantings is often limited by cost and labour but is commonly used in urban garden beds and similar.


After planting, tubestock requires active monitoring, care and attention to ensure they have the best possible chance of establishing. The more effort you put into site protection and preparation, the lower the maintenance burden, but you will still need to do ongoing weed control, plant guard maintenance and in some cases replacement plantings. A result of 80% survival or greater is what you need to aim for.
This is a hard question to answer, as what success looks like will vary across sites. It is more important to understand that there will be a time lag between when you plant and when the full benefits of revegetation will be realised. Know that your efforts are never in vain, and that you are investing in revegetation, not only for yourself, but for future generations. As the photos below show there is something about restoring riparian areas that makes you smile!


Why is riparian restoration important?
Existing guides on tubestock planting and riparian restoration:
How can I tell the condition of my waterway?
To plant or not to plant? When to encourage natural regeneration:
Funding to assist restoration of existing vegetation communities
I am ready to plant. What next?
Note on direct seeding:
What plants do I choose?
How many plants do I need and where do I put them?
How big should my planting site be?
When should I plant?
How do I prepare my site?
How do I plant tubestock?
After planting, what then?
What does success look like?
This tubestock planting guide has been produced as part of our Rivers of Carbon – Source Water Linkages project, a partnership between Rivers of Carbon and WaterNSW to protect and restore river and riparian areas in Sydney’s water catchments. The project covers a significant area encompassing Braidwood, Goulburn and the Southern Highlands, where we are working with landholders keen to manage their rivers, creeks, wetlands or ponds, to reduce erosion, improve water quality, stabilise banks and boost biodiversity through revegetation. Managing stock is central to our on-ground work, so fencing and off stream watering are key strategies we develop with landholders.

Rivers of Carbon – Source Water Linkages is being funded through our partnership with WaterNSW. We also work closely with South-east Local Land Services who offer support for broader landscape and erosion issues through their Rural Landscapes Program.
All images directly supplied by or reproduced by Rivers of Carbon, with permissions from the copyright owner(s), unless stated otherwise.


